Nested Tests
@Nested tests give the test writer more capabilities to express the relationship among
several groups of tests. Such nested tests make use of Java’s nested classes and
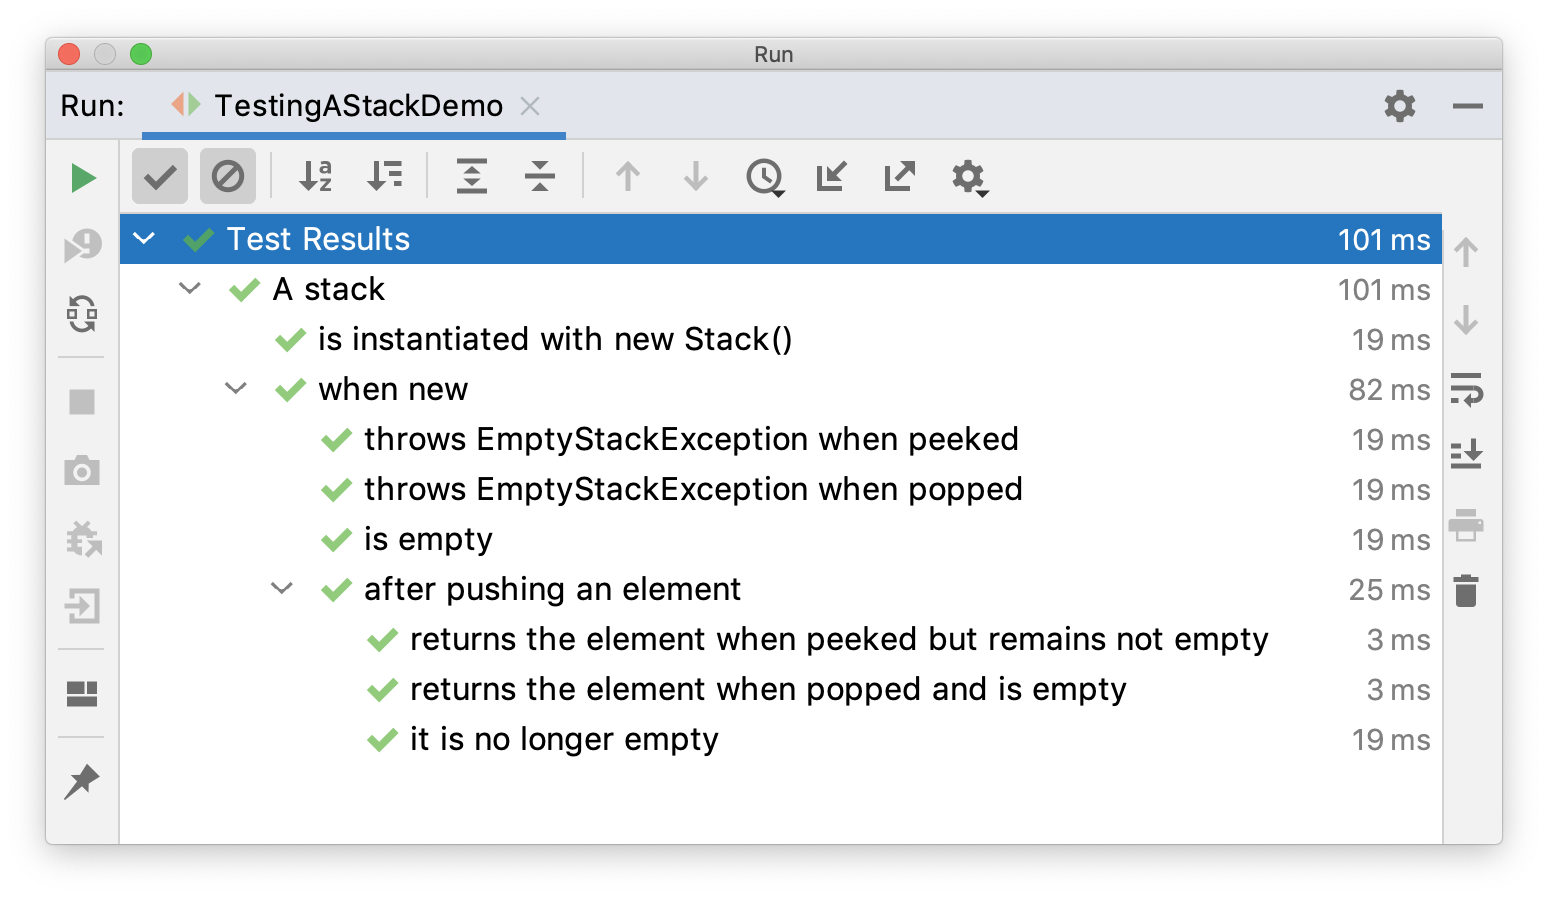
facilitate hierarchical thinking about the test structure. Here’s an elaborate example,
both as source code and as a screenshot of the execution within an IDE.
import static org.junit.jupiter.api.Assertions.assertEquals;
import static org.junit.jupiter.api.Assertions.assertFalse;
import static org.junit.jupiter.api.Assertions.assertThrows;
import static org.junit.jupiter.api.Assertions.assertTrue;

import java.util.EmptyStackException;
import java.util.Stack;

import org.junit.jupiter.api.BeforeEach;
import org.junit.jupiter.api.DisplayName;
import org.junit.jupiter.api.Nested;
import org.junit.jupiter.api.Test;

@DisplayName("A stack")
class TestingAStackDemo {

	Stack<Object> stack;

	@Test
	@DisplayName("is instantiated with new Stack()")
	void isInstantiatedWithNew() {
		new Stack<>();
	}

	@Nested
	@DisplayName("when new")
	class WhenNew {

		@BeforeEach
		void createNewStack() {
			stack = new Stack<>();
		}

		@Test
		@DisplayName("is empty")
		void isEmpty() {
			assertTrue(stack.isEmpty());
		}

		@Test
		@DisplayName("throws EmptyStackException when popped")
		void throwsExceptionWhenPopped() {
			assertThrows(EmptyStackException.class, stack::pop);
		}

		@Test
		@DisplayName("throws EmptyStackException when peeked")
		void throwsExceptionWhenPeeked() {
			assertThrows(EmptyStackException.class, stack::peek);
		}

		@Nested
		@DisplayName("after pushing an element")
		class AfterPushing {

			String anElement = "an element";

			@BeforeEach
			void pushAnElement() {
				stack.push(anElement);
			}

			@Test
			@DisplayName("it is no longer empty")
			void isNotEmpty() {
				assertFalse(stack.isEmpty());
			}

			@Test
			@DisplayName("returns the element when popped and is empty")
			void returnElementWhenPopped() {
				assertEquals(anElement, stack.pop());
				assertTrue(stack.isEmpty());
			}

			@Test
			@DisplayName("returns the element when peeked but remains not empty")
			void returnElementWhenPeeked() {
				assertEquals(anElement, stack.peek());
				assertFalse(stack.isEmpty());
			}
		}
	}
}
When executing this example in an IDE, the test execution tree in the GUI will look similar to the following image.
In this example, preconditions from outer tests are used in inner tests by defining
hierarchical lifecycle methods for the setup code. For example, createNewStack() is a
@BeforeEach lifecycle method that is used in the test class in which it is defined and
in all levels in the nesting tree below the class in which it is defined.
The fact that setup code from outer tests is run before inner tests are executed gives you the ability to run all tests independently. You can even run inner tests alone without running the outer tests, because the setup code from the outer tests is always executed.
Only non-static nested classes (i.e. inner classes) can serve as @Nested test
classes. Nesting can be arbitrarily deep, and those inner classes are subject to full
lifecycle support with one exception: @BeforeAll and @AfterAll methods do not work by
default. The reason is that Java does not allow static members in inner classes prior
to Java 16. However, this restriction can be circumvented by annotating a @Nested test
class with @TestInstance(Lifecycle.PER_CLASS) (see
Test Instance Lifecycle). If you are using Java 16 or higher,
@BeforeAll and @AfterAll methods can be declared as static in @Nested test
classes, and this restriction no longer applies.
|
Interoperability
@Nested may be combined with
@ParameterizedClass in which case the nested test
class is parameterized.
The following example illustrates how to combine @Nested with @ParameterizedClass and
@ParameterizedTest.
@Execution(SAME_THREAD)
@ParameterizedClass
@ValueSource(strings = { "apple", "banana" })
class FruitTests {

	@Parameter
	String fruit;

	@Nested
	@ParameterizedClass
	@ValueSource(ints = { 23, 42 })
	class QuantityTests {

		@Parameter
		int quantity;

		@ParameterizedTest
		@ValueSource(strings = { "PT1H", "PT2H" })
		void test(Duration duration) {
			assertFruit(fruit);
			assertQuantity(quantity);
			assertFalse(duration.isNegative());
		}
	}
}
Executing the above test class yields the following output:
FruitTests ✔
├─ [1] fruit=apple ✔
│  └─ QuantityTests ✔
│     ├─ [1] quantity=23 ✔
│     │  └─ test(Duration) ✔
│     │     ├─ [1] duration=PT1H ✔
│     │     └─ [2] duration=PT2H ✔
│     └─ [2] quantity=42 ✔
│        └─ test(Duration) ✔
│           ├─ [1] duration=PT1H ✔
│           └─ [2] duration=PT2H ✔
└─ [2] fruit=banana ✔
   └─ QuantityTests ✔
      ├─ [1] quantity=23 ✔
      │  └─ test(Duration) ✔
      │     ├─ [1] duration=PT1H ✔
      │     └─ [2] duration=PT2H ✔
      └─ [2] quantity=42 ✔
         └─ test(Duration) ✔
            ├─ [1] duration=PT1H ✔
            └─ [2] duration=PT2H ✔